Mirro makes the set-up process easier by using Imports . You can import multiple information in your application:
- Users and their details
- Management lines
- Employment Contracts
- Performance managers and coordinators
- Time off balances
- Carry over days
Import files support .xlsx format and import templates are available to download. For a successful import, please mind data formatting from the downloaded templates.
To import the data in Mirro, you will need to access the Admin Area module > Import data section. After deciding which details you would like to upload, you will need to download the template which should be filled-in with the information according to the header and the legend.
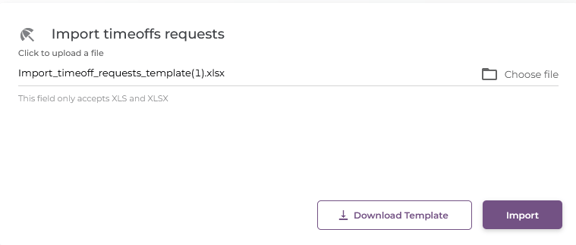
Import time-off requests, using the Import time-off requests option from Admin Area module > Import data section.
Getting the time off balance up to date for everyone all at once using imports. One of the main admin issues companies are facing is correct handling of attendance. Use these imports - time off requests and carry over days - when onboarding your company and you are good to go for your entire journey with Mirro.
Using Mirro, you have the possibility to upload requests leave all at once. Before importing the files you will need to define the rules in the Leave Settings section from the Admin Area module. You can find more information on our article: How to define the leave rules.When filling-in the details in the import file, please mind data formatting according to the legend below:
- The column Employee Identifier should be filled-in with the e-mail address of the user or the employee identifier (available in the position details of the user);
- The column Time off rule refers to the rule's name from which the user is taking a request. The rules can be seen by accessing the Leave settings section from the Admin Area module;
- The column Created Date refers to the date when the request has been created. Please mind data formatting: Month / Day / Year, example: 1/20/2020;
- The column Start Date refers to the date when the time off is starting. Please mind data formatting: Month / Day / Year, example: 1/20/2020;
- The column End Date refers to the date when the time off is ending. Please mind data formatting: Month / Day / Year, example: 1/20/2020;
- The column Status refers to the status of the request which can be approved or new. Using the approved status you will be uploading the request already approved. Using the status new you will be uploading the requests and they will be in pending, waiting to be approved;
- The column Days refers to the days from the time-off request;
- The column Approver Employee Identifier refers to the user which is approving the request, which can be filled-in with the e-mail of the user found in Mirro.
Each request should represent a row in the file. For example, if Jack has two requests in a month, one for 10 January and another one for 24-25 January, each request should be added separately;
 When the file is ready to be imported, you will need to access the Admin Area module > Import Data section > Select the file to upload and access the option Import.
Once you accessed the import option, you will be redirected in the Import History section where you can track the progress of the import. At the same time, when the process will be finished, you will receive a notification to know that the process is finished.
When the details will be imported, you will be able to find the time-off requests in Leave requests from the Leave & Attendance module. At the same time, the user balance will be updated according with the requests uploaded.
You can also check the Time off requests list to visualize all requests and download the report, accessible in the Dashboard module > Time Insights section.