How to set-up individual leave rules
We know how dynamic the leave policy can get from one company to another, and storing everything in Excel, on paper, and in the drive can get overwhelming. This is the reason why with MIRRO you will be able to set up General Leave rules applicable for all colleagues or Individual Leave rules applicable for each particular colleague in part.
Customize each colleague's leave balance in part!
If you just started using MIRRO you will need to make sure that you open the leave balance of the user, firstly. To open the leave balance you need to define the General Leave Rules, think about them as a base on which you will build the rest of the leave policy. For more details about defining the General Leave Rules, I invite you to access the article How to define the leave rules.
Once the user has the leave balance open, you can customize it by accessing the user's Leave tab from their personal profile. To do so you will need to access the Employment data option from the user profile and go to the Leave tab. Make sure you have the proper access rights to perform the changes, as Organization Specialist and Time-off Approver. For more details about the access rights, please visit the article How to grant access rights to a user.
An even a faster way to access the Leave tab is to search by your colleague's name in the search bar and access the quick link, as shown below:

Once the Leave tab is accessed you will find multiple options to customize the leave balance.

-> Days available now: the accrued days of vacation which are calculated based on the third column. These will be the days that the user is entitled to use at the current moment according to the working period since the hire date or the beginning of the year.
Even if in the example given, Jack has 37 days available now, Jack will still be able to request even more days. There is no restriction applied when the leave request is added.
-> Days remaining this year: the vacation days that the user can still use for the rest of the year, calculated based on the third and fourth columns.
-> Leave from rules that apply to users this year: the total amount of days that the user can use for leave requests. Using the info option, you will be able to see the total unfolded. Here you will find the vacation days coming from the general leave rules but also the additional days that the user gained over time.
-> Total days booked this year: all leave types: here you will be able to see how many days the user booked as a vacation.
-> Other leave days used: here you will be able to see how many days the user booked for different special events, for example, marriage or paternal leave.
2. Freeze the leave balance:
3. Adjust the leave balance manually:Think about the cases when a user needs a maternity leave or a sabbatical year or even just a rest period. For more details please visit How to freeze the user leave balance.
There are two types of adjustments you can perform manually:
3.1. Adjust days available now for the times when you would like to offer a bonus to one of your colleagues for outstanding results, for example.
The adjustment will have an impact on the balance immediately giving your colleague the possibility to book a vacation day right away. This is a one-time adjustment and you can decide if you would like to see it in the payroll reports and if should be carry-over the next year in case your colleague is not using it.
The bonus days are the days that are deducted first from the user balance.
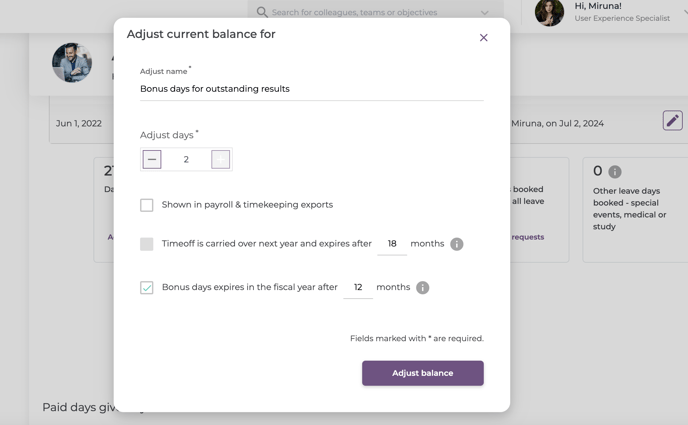
What happens when you want this bonus to expire in the fiscal year?
We know the fiscal year may not be the same for every company, so now you can edit it accordingly to your needs!
You can edit the fiscal year from the module Admin Area- Company Settings- Company Addresses. From here, you can click on any location, and you will see the field Fiscal year start.
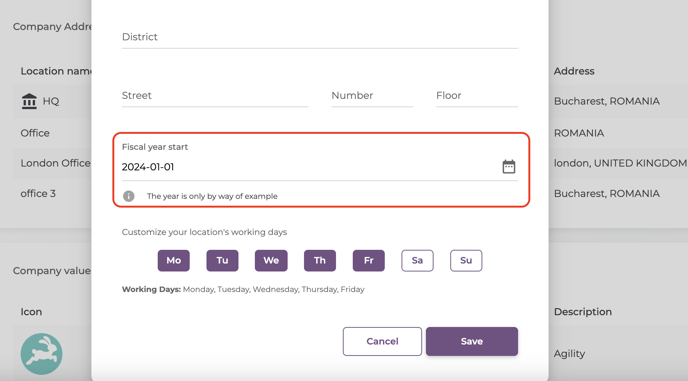
You just need to complete it with the start date and click on Save. This change will be recurring every year.
Let's take an example
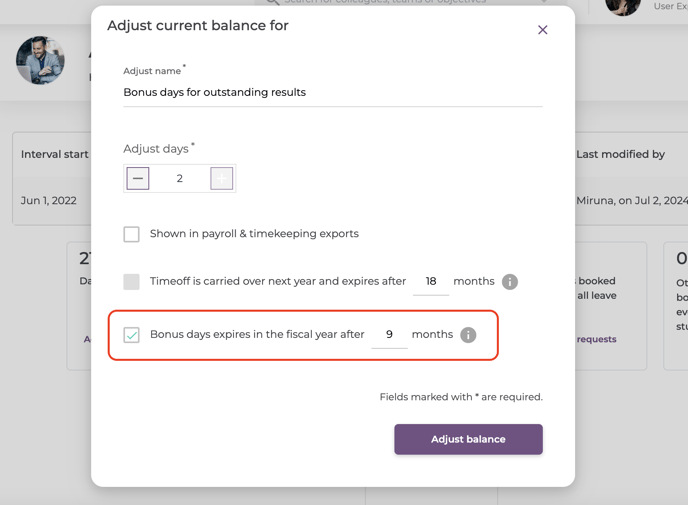
Let's say the fiscal year in your company starts on the 1st of January, and you want the bonus to expire in October, the same year.
You will have to check the field and complete the blank space with 9, so the bonus will expire on the first day of the 10th month of the year.
You will have to check the field and complete the blank space with 9, so the bonus will expire on the first day of the 10th month of the year.
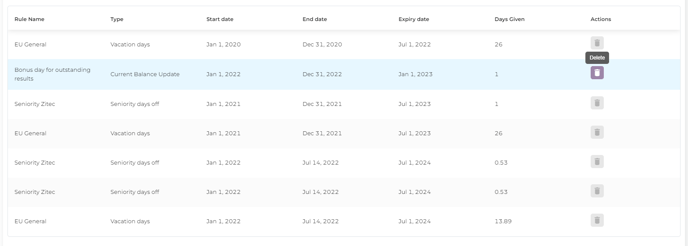
After you click on Adjust balance, the user's balance will automatically be updated, and you will be able to see the new rule, with the option to delete it:
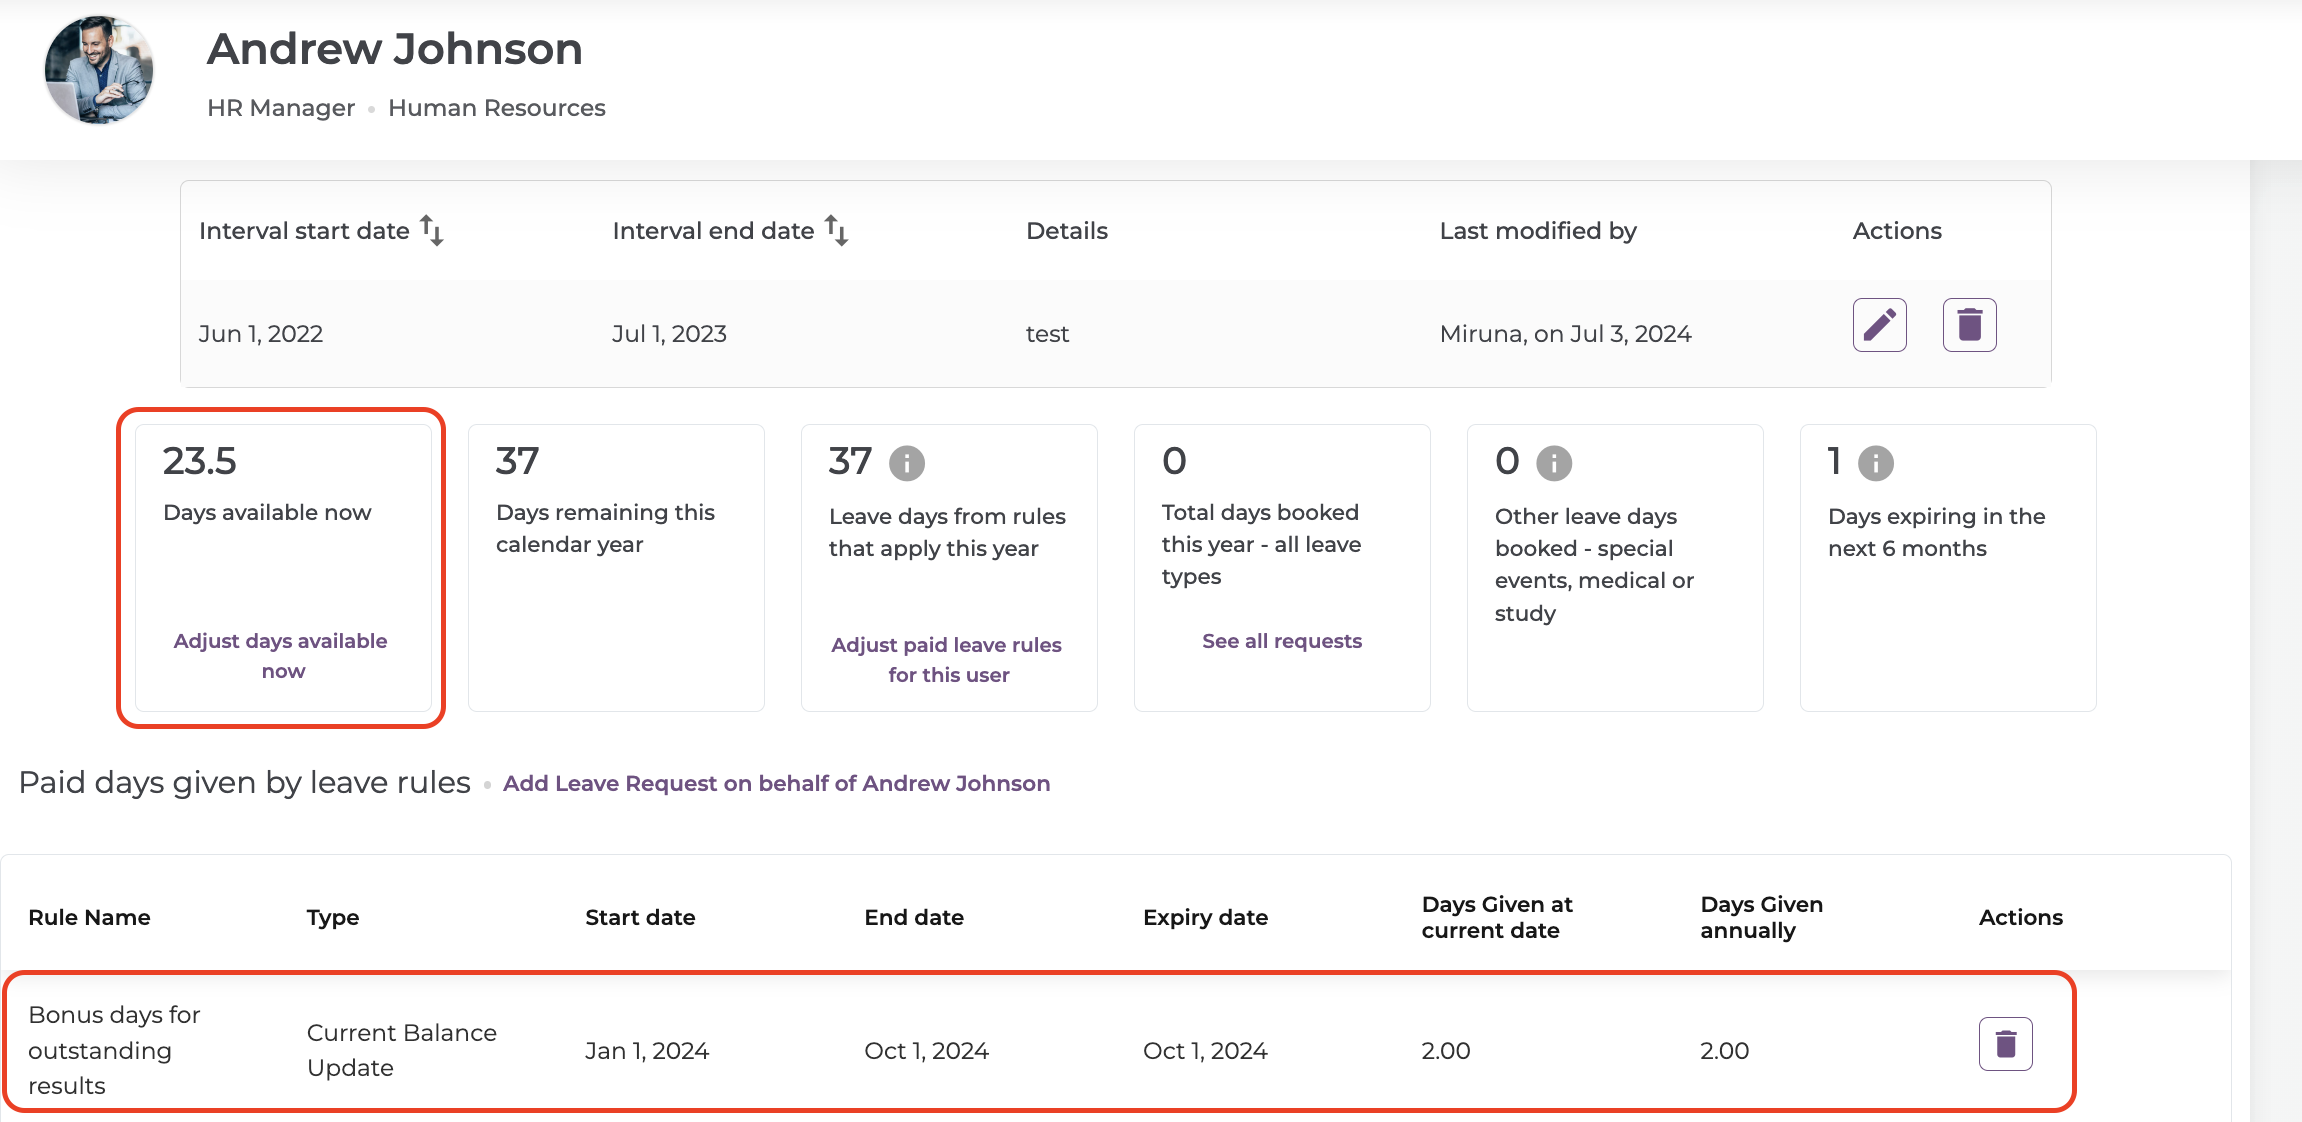
3.2. Adjust paid leave rules for this user for the times when one of your colleagues is renegotiating their contract and receives two days extra which will be added on top of the normal vacation days.
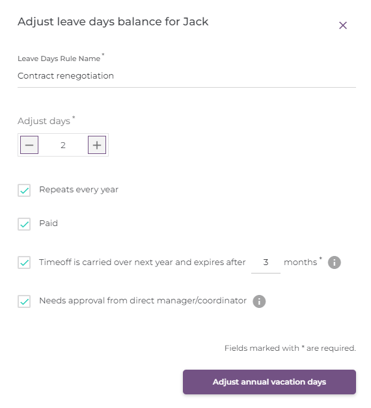
When defining such a rule, make sure to check the following fields if applicable:
-> Repeats every year - if the days will be applied year by year
-> Paid - if the extra days are paid or not - the information is important for the payroll reports
-> Time-off is carried over next year - if the days should be carried over in case the user is not using them
-> Needs approval from direct manager / coordinator - always check this field
Sometimes it might happen that one of your colleagues announces on short notice that needs a day off. In such situations, you will be able to add a leave request on behalf of your colleague, as can be seen below:
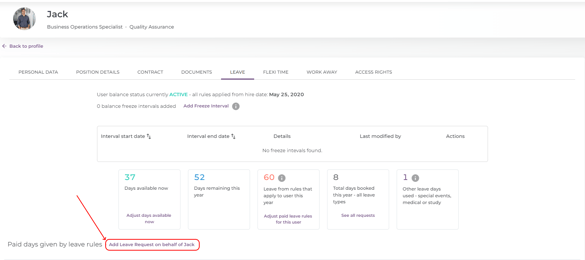
When adding the leave request, make sure you choose the proper leave request from the existing rules that were defined and fill in all the applicable fields. Once the leave request is added, a notification to the direct manager of the user will be sent and the user will be notified and the balance will be updated automatically.
5. Check the balance history:
Individual leave rules are a bit more human-friendly. Whether you’re awarding some bonus days, or want to change individual rules for someone, you’ll be able to track these changes in the balance log and will be able to delete any unwanted changes here.
